
Light scratches on a mirror stainless steel sculpture can be removed by working through a controlled sanding and polishing sequence. In our workshop, we repair the surface in stages, then blend it into the surrounding mirror finish so that the reflection flows across the curve again. This guide follows the method we filmed on a stainless steel sphere: P600 sanding, a wool wheel with red compound, a cotton buff with blue compound, and a final foam-pad polish. Each stage removes the marks left by the one before it. We judge the result by the reflection as well as the shine.
Can this scratch be polished out?
We first wash the area with mild soapy water and wipe it clean. Dirt or transferred material can look like a scratch, so we inspect the clean surface before choosing an abrasive. Draw a fingernail gently across the mark: if it catches, treat the damage as a deep scratch rather than a light surface mark.
Fine scratches on uncoated mirror stainless steel are the focus of the four steps below. Deep scratches and pits need the damaged surface assessed and corrected first. A dent changes the shape of the metal; polishing it brighter will not restore the curve or straighten its reflection.
Gold and coloured PVD finishes need a different repair. Sanding or polishing removes the coating, so the surface will need recoating. We also refer scratches across welds, large damaged areas and high outdoor installations to the fabricator, who can plan the repair around the form and access.
What you need
- A variable-speed polisher, or an angle grinder with a compatible backing pad and accessories rated for the machine.
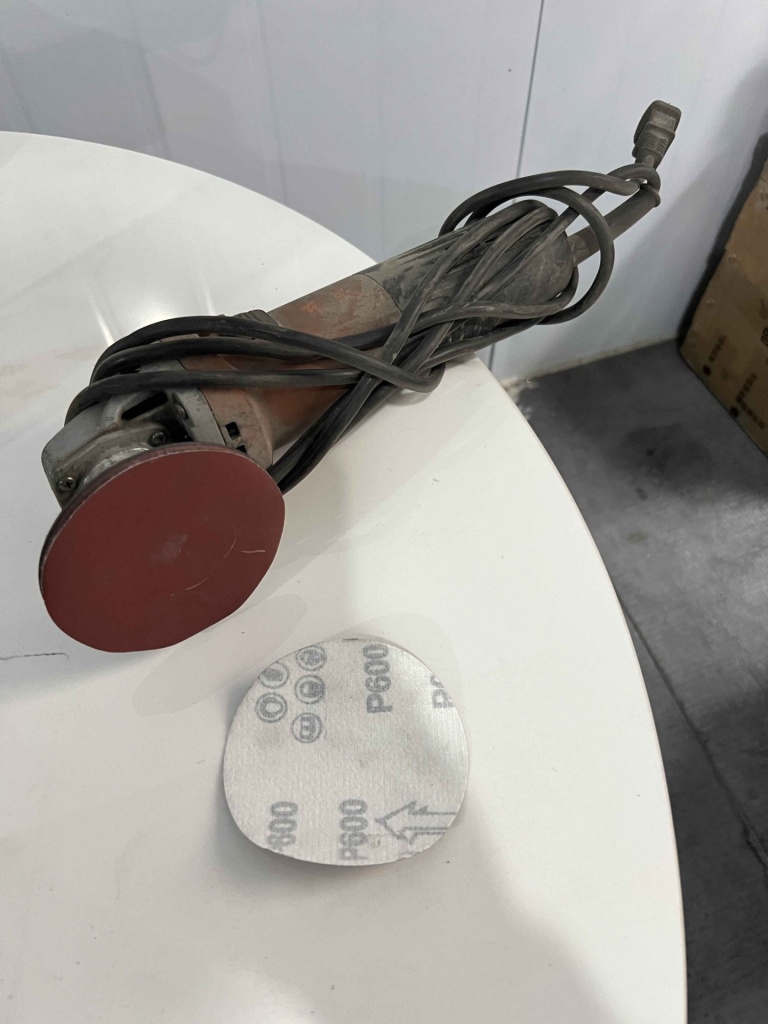
- P600 sanding discs.
- A wool wheel and red cutting compound.
- A cotton buff and blue finishing compound.
- A foam pad and fine polishing liquid.
- Clean microfibre cloths, mild soapy water and masking tape.
We keep each wheel with its own compound and use clean cloths between stages. Mask adjacent areas that need protection without covering the repair itself. Follow the equipment and compound instructions for operating speed and protective equipment; we do not use one machine setting for every curve or accessory.
Step 1 – Sand out the scratch with P600
For the light scratch shown in our workshop sequence, we begin with P600 on the backing pad. We apply light pressure, keep the machine moving and follow the curve of the sphere. The worked area extends a little beyond the scratch so that we can blend the surface instead of cutting a narrow groove along the mark.
We stop and wipe the area to inspect it as we work. The aim is for the scratch line to disappear and leave an even, matt sanding pattern. We do not keep pressing on one point to chase a bright line. Uneven sanding at this stage will show in the reflection later, even after the metal becomes shiny. Once the pattern is consistent, we clean away the sanding residue before changing tools.
Step 2 – Cut back with a wool wheel and red compound
We change to a wool wheel with red cutting compound to remove the P600 sanding marks. The tool continues to move across the curved repair area with controlled, light pressure. We work across the sanding pattern, checking the whole patch rather than concentrating only on its centre.
As the marks are removed, the matt area becomes brighter. Some haze can remain at this stage; the next buffing step refines that surface. What we do not want to carry forward is a distinct scratch pattern that the earlier cutting stage has left behind. We wipe off the compound and look again under consistent light. A coating of polishing residue can hide the surface, so we clean it before deciding that the area is ready for the cotton buff.


Watch Step 2: wool wheel and red compound
Step 3 – Refine with a cotton buff and blue compound
Next, we use a clean cotton buff with blue finishing compound. This refines the hazy surface towards a clear mirror reflection. We keep the buff moving and work a little farther into the surrounding finish, blending the repaired area so that its boundary becomes difficult to see.
The transition matters as much as the centre. A sharply defined polished patch can catch the light differently from the rest of the sculpture, even when the scratch itself has gone. We wipe away the residue and move our viewing position around the sphere, following reflected lines through the repaired and untouched areas. If a distinct boundary or earlier sanding marks remain, we correct the finish before moving to the final polish. Extra shine alone does not remove those marks.


Watch Step 3: cotton buff and blue compound
Step 4 – Finish with a foam pad and fine polish
We finish with a foam pad and fine polishing liquid, following the product instructions. This last pass brings up the clarity of the surface after the previous stages have removed the scratch and sanding marks. We clean off the remaining polish with a fresh microfibre cloth before judging the result.
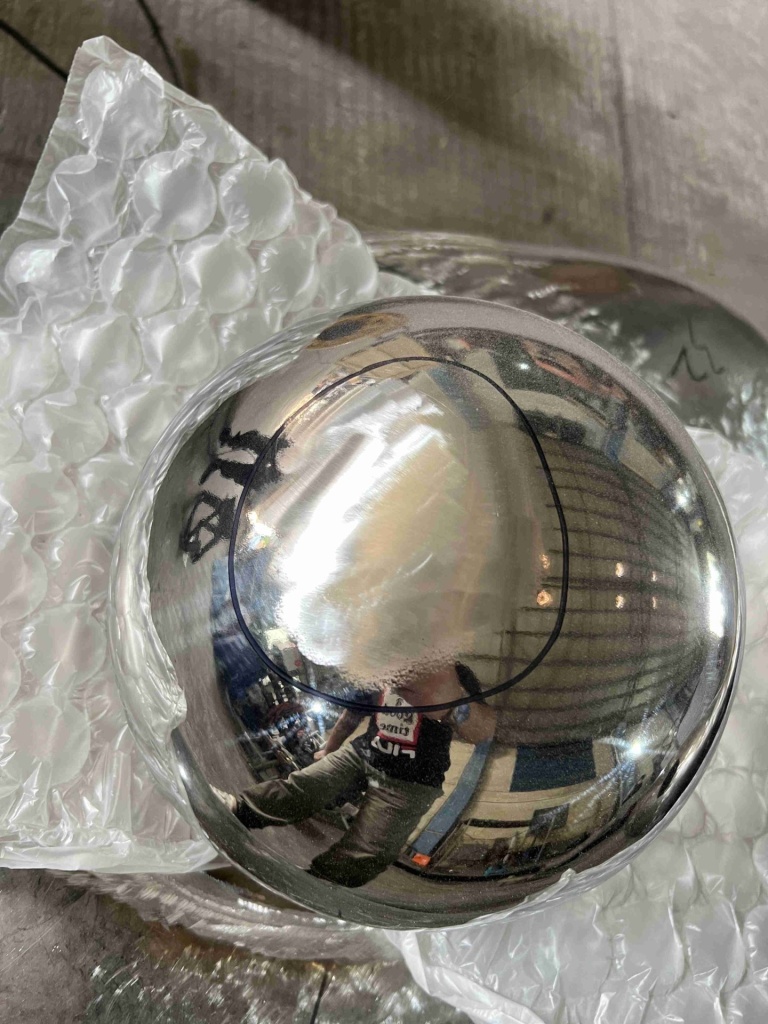
For the final check, we follow a straight reference line, such as a roof edge or doorway, in the reflection. It should curve smoothly with the sphere and continue across the repaired area without an abrupt step, pinch or cloudy patch. We look from more than one position and check the transition into the original finish. Our guide to judging mirror polish on stainless steel sculpture explains this reflection-line test.

Watch Step 4: foam pad and fine polish
Watch the final polishing and finished reflection
Mistakes that leave a visible patch
Skipping a stage carries its scratch pattern into the next finish. We complete each step before changing wheels; a fine compound cannot simply cover coarse sanding marks. Too much pressure creates another problem. Holding the tool in one place builds heat, which can cause yellowing and distortion in thin metal.
We never use the same wheel for red and blue compound. Coarse compound carried into the finishing stage can introduce fresh marks just when the surface should be becoming clearer. Residue on a cloth can do the same, so we change to a clean cloth as needed.
Polishing only the scratch line can leave a bright strip or an obvious patch. Blend into the surrounding surface and keep checking its reflection. After repair, avoid steel wool and chlorine-based cleaners: they can scratch or damage the finish. Routine cleaning should help preserve the polished surface rather than start another repair.
When to ask the fabricator
For deep scratches, pits, damage across a weld, a large affected area or a gold or coloured PVD finish, send the fabricator an overall view and close-ups of the damage. Include the sculpture dimensions and its location, especially if access is restricted or the work stands high outdoors. These details help establish whether surface refinishing, shape correction or recoating is needed.
For new work, we protect the finished surface before shipping with foam wrapping, fixed supports and wooden crates. Read our packing, shipping and installation guide for the protection, sectional delivery and unloading arrangements. Our mirror stainless steel sculpture fabrication page explains how polishing, inspection and packing fit into the project.
FAQ
Does polishing remove material?
Yes. Sanding and polishing remove a very thin layer of material as they level and refine the surface. Controlled scratch repair is a normal workshop process, but we avoid repeated heavy grinding in the same spot because it can change the form and its reflection.
Can scratches on gold or coloured stainless steel be polished out?
Not with this method when the colour is a PVD coating. The abrasive removes the coating along with the scratch. That surface needs a repair plan that includes recoating.
How should I clean a mirror stainless steel sculpture?
Use a clean, soft cloth and mild soapy water, rinse and dry. Avoid steel wool and chlorine-based cleaners. The care section in our mirror-polish guide covers routine cleaning and keeping the reflection clear.
Planning a new mirror sculpture?
Explore our mirror fabrication approach, with mirror stainless steel spheres and concave mirror discs as references for different forms. Send your design, dimensions, finish requirements and project location so that we can discuss the surface and fabrication together.
Related guides
- Choosing mirror, brushed or sandblasted finishes
- Specifying gold-tone stainless steel
- Choosing between 304 and 316L
Modern Art Sculpture is a brand of Xiamen Meibile Import And Export Co., Ltd. We fabricate in our own workshops for stainless steel, fiberglass and resin.